Have you ever wondered how you can apply the mantra of “Set-it and Forget it” from 1990’s infomercials to your cannabis plants? The daily tasks required for a healthy, bountiful harvest can feel never ending – especially so with watering. Farmers often feel married to their plants. From planting to harvesting, you can never take a day off.
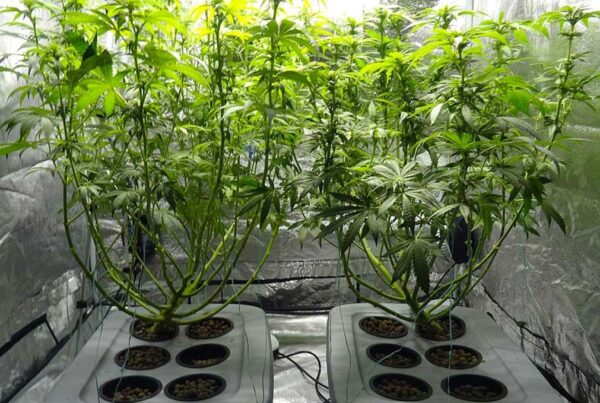
This daily burden is why irrigation systems have become a vital component for many successful growers. Out of all the irrigation systems, Tropf Blumats is one of the simplest. Blumats has managed to incorporate a moisture sensor and drip irrigation into every single pot – all without additional costs nor complicated monitoring system. Once optimized, watering is entirely automated, relying not on electronic components but an innovative ceramic sensor system.


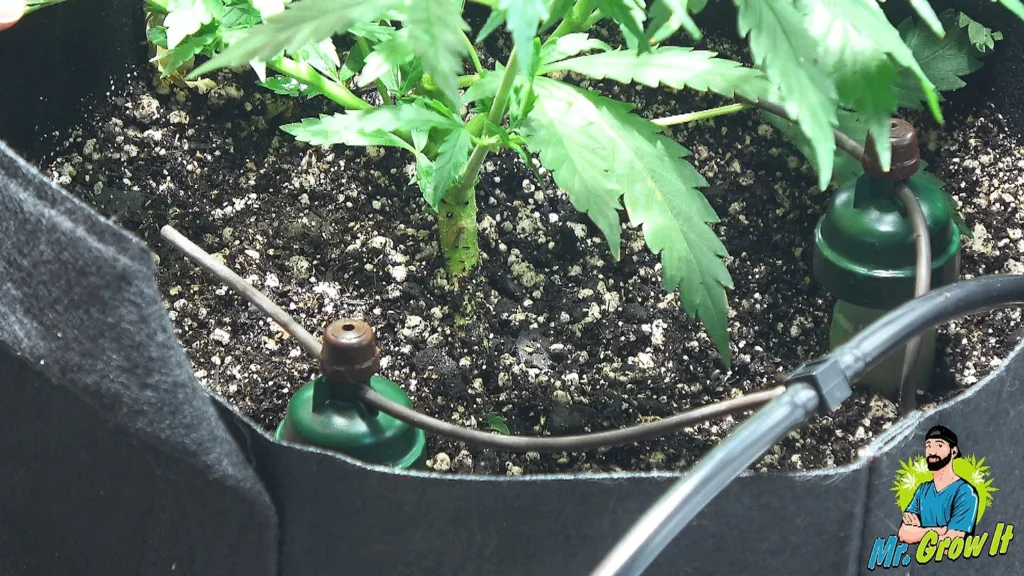
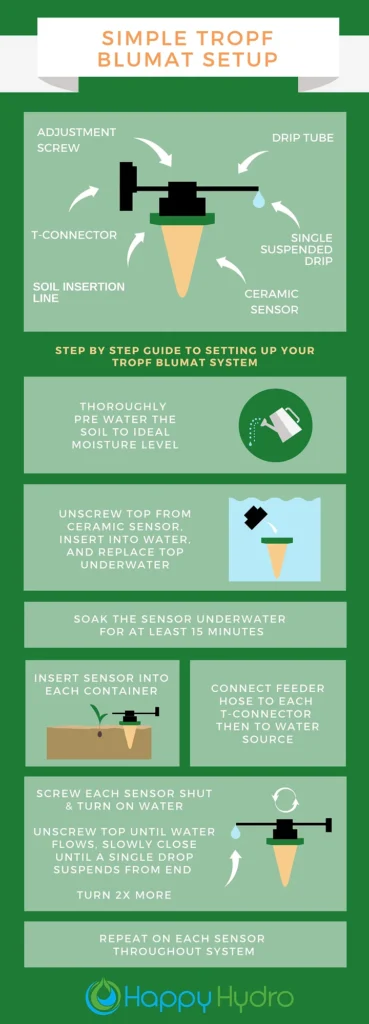
The Tropf Blumats system relies on a series of ceramic sensors, inserted next to the root system of each plant. The grower calibrates each sensor before installing, which allows the sensor to read the surrounding moisture of its environment. The sensor tip (which resembles a carrot), naturally releases water as the soil demands. Keeping the soil as wet (or as dry) as it was when initially installed. Should the environment change, the drip system attached to each sensor applies more water until the soil returns to optimal levels.
It is revolutionary in the way it reads moisture content without any complicated electronic components. The Blumats system reduces the daily labor required to keep cannabis plants happy and healthy. It does so with less grunt work, less guesswork, and more consistency than even an experienced cultivator could manage.
How to Install Blumat Watering Stakes for Cannabis
A worry-free Tropf Blumats system is all in the setup. Tropf Blumats system needs a bit of careful tinkering in the initial install, but if you are already an avid cannabis cultivator – it’s easy. The step-by-step installation follows:
1. Pre-Water Your Cannabis Plants
Before installing the Blumats system, you’ll want to pre-water the plants. Once inserted, the carrots work to maintain a state of balance between its internal and external environments. If the external environment is too dry (or too wet), the sensor will match that moisture level. Therefore, before insertion, water your cannabis! You want the sensor to match an ideal moisture content.
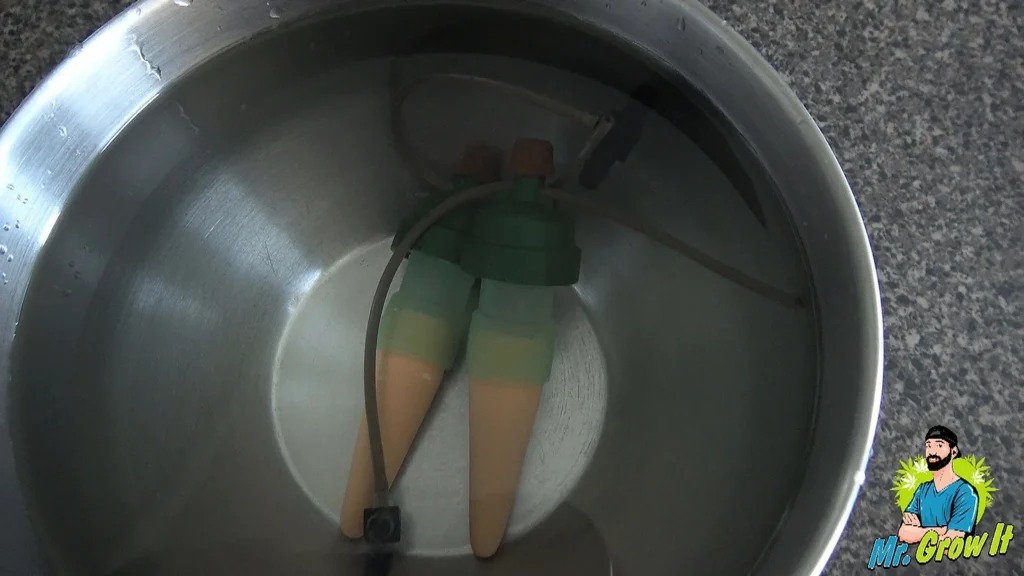
2. Condition the Blumats Sensors
Unscrew the heads of all the sensors you are planning on using and fully submerge the sensors into a bucket of water. Once submerged, screw the tops back on, but do so while still under water. By closing the carrots underwater, you avoid capturing air bubbles within the sensors.
Once you have reattached the tops to the bottoms, keep the entire unit submerged for at least 15 minutes. This conditions the carrots to sense moisture content when inserted into the soil.
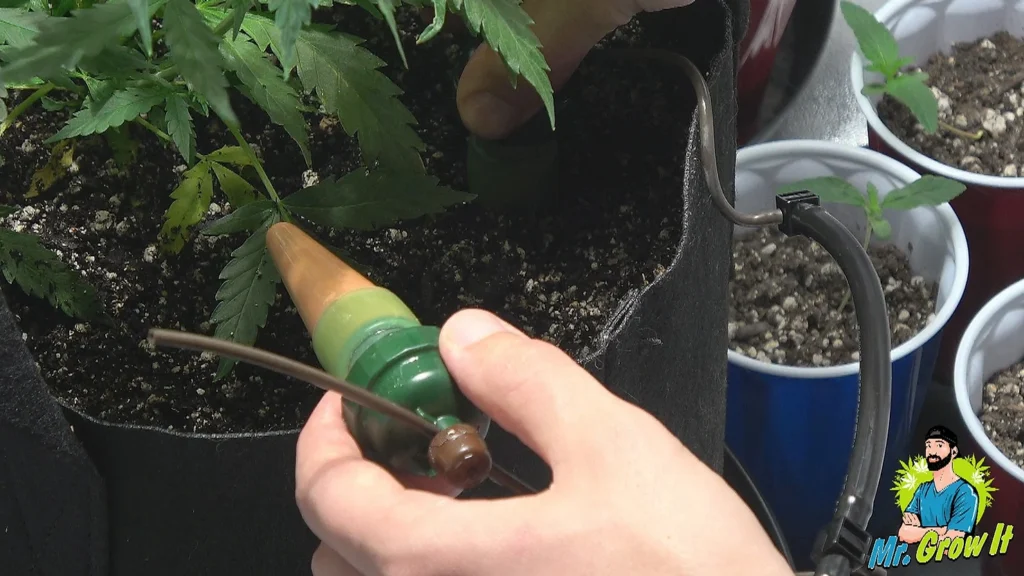
3. Insert the Sensor Next to the Cannabis Plants
In each pot, insert the carrot down into the pre-watered soil a few inches from the cannabis stem. You want to make sure the sensor gets an accurate reading of the moisture content of the soil around the root system. Insert up to the point indicated, just above the ceramic component.
Insert the drip tube into the top of the sensor. It needs to extend roughly 8 centimeters from the cap of the sensor. Generally speaking, for pots under 25 centimeters in diameter, you’ll only need one sensor. You can add more for larger containers, or connect to additional drip lines (up to five per carrot).
4. Connect the Sensors to the Feeding Tube
Now it’s time to connect the sensors to the water source. If you are connecting to a reservoir tank, use the tank connector. If you are connecting directly to a hose or other pressurized water source, it’s important to install the pressure regulator first. Either of these components connects directly into the 8mm feeding tube.
Cut appropriately sized pieces of the feeding tube to connect each sensor by way of the t-connector. At the end of the system, replace the t-connector with an end-piece to close off the connection. Connect the first container to the main feeding tube.
5. Adjusting the System After Installation
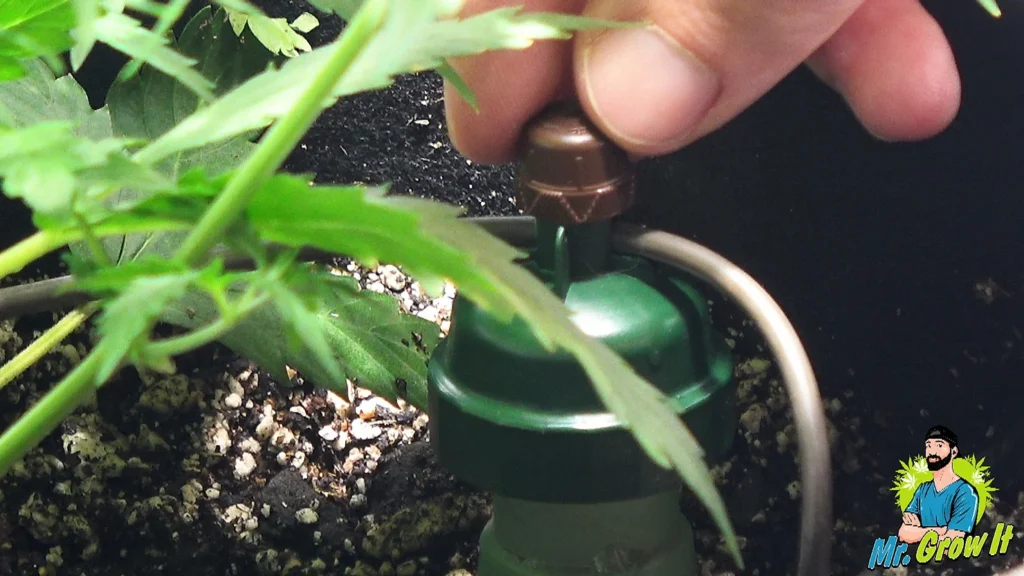
Up until now, the installation should be pretty straightforward. Now it’s time for the system adjustments, which can take a little finesse. Before turning on the water for testing, tightly screw all the sensors closed. Do so by tightening the top of each screw.
Once the system is closed from start to finish, turn on the water. Inspect each sensor and drip tube looking for dripping water. Tighten the screws on the sensor if you find any water leaking out.
Starting at the last sensor, slowly open the screw by a few counterclockwise screws. Eventually, water begins to drip out the end. The goal is to see a single stationary drop poised at the tip of each drip tube; you may need to close the head of the sensor by a turn or two to achieve this effect. A final adjustment is required after you have a drop hovering at the end of the line – you must set this sensor by turning the screw by two arrow points (¼ turn). Proceed through the system, repeating these steps for each sensor.
6. Monitor the system
If this is your first go-round with Blumats or even your tenth, you’ll want to check the system daily for the first week or so. When you initially install it, the system doesn’t need to release any water because the soil is already moist. However, as the soil dries out, you want to ensure the system is fully functional and releases as your plants need it. Check daily for soil moisture, tube leaks, and appropriate water release at the end of the drip tubes.
Pro Tips From the Experts
Setting up any new irrigation system requires a bit of tinkering. Tropf Blumats isn’t any different in this sense. If you are ready to install for your cannabis grow, why not take a few pointers from the experts? Blumats irrigation is already used across the cannabis industry, in small scale commercial operations and in homes who grow their own medicine.
Helpfully, these cannabis experts have worked out the kinks of the Blumats system as applied to the cannabis environment and provided a few pro tips as you get started. No need to stumble your way through the installation process, take a few hints from those farmers already growing cannabis with a Blumats sensor system.
1. Optimize Soil Moisture Content Before Installation
The beauty of the Tropf Blumat system is its ability to regulate the moisture in your soil according to your preferred level. It regulates moisture according to the level it encountered when you first inserted the carrot. If the soil is too dry (or too wet), the Tropf Blumat sensor will continue to maintain it. Before installation, water your plants several times and carefully confirm the moisture content is ideal for the growing environment. The Tropf Blumats system is only as knowledgeable as the gardener using it.
2. Don’t Panic During the First Week of Install
It’s common to have to adjust the system during the first few days of use. Depending on your final set up, you’ll likely have to make microscopic adjustments to one or more of the sensors by ¼” at a time. Close monitoring during the first week of use will mean a better-optimized system for the duration of the plant’s life cycle. Getting the system dialed in takes a bit of patience, but the goal is to have a single drop hovering from each drip line.
3. When in Doubt Add a Moisture Meter
If you are not familiar with the optimal moisture content you need for your cannabis plants or are working with new environmental conditions – it can be helpful to have an additional moisture meter on hand. This is a safeguard against any hiccups within the Blumats irrigation system. If it waters too much or too little, use the reading from the digital moisture meter as a backstop. Because a carrot releases water below the surface of the soil, you may think the container is too dry. A moisture monitor prevents any second-guessing.
4. Avoid Direct Contact with Perlite or Volcanic Rock
If you are growing in a medium rich in perlite or volcanic rock type materials, this can confuse the sensors. The carrot requires a solid connection to the soil to get accurate moisture reading. Materials like perlite read overly dry, leading the sensor to assume the soil needs more water. When you initially insert the carrot into a soil containing high levels of perlite type materials line the pocket with soil or coco coir. Direct connection to the soil is critical for an accurate reading on moisture content.
5. Avoid Bumping the Sensor After Installation
There are a lot of unique installation methods for the Tropf Blumats system. Some cultivators use a combination of short and tall carrots to read varying levels of moisture of deeper pots. Others install the carrot horizontally. Whatever method you go with, avoid handling the carrots after installation. Bumping the carrots, even during nutrient feedings, can dislodge its connection to the soil. It may require a slight adjustment or full reinsertion to reconnect and provide accurate waterings.


There is a reason the Tropf Blumats system is so beloved among passionate cannabis cultivators. Watering isn’t a chore anymore – it’s hands-free and easy. Your plants receive a consistent and constant supply of water, without any hiccups. Even if you’ve had to run off on errands, or a much needed weekend getaway, the Tropf Blumats is the essential cannabis plant sitter you’ve always dreamed about. Check out the Blumats autowatering system by clicking here.
Thanks to Happy Hydro for this guest post!
![]()